
As you may have noticed from yesterdays New Year’s / Anniversary Post, one of my most popular articles from 2012 was on Making my own IDPA Targets. I put that post together back in June of 2011 with the intention of making a series which included Metric and Classic USPSA Targets. For whatever reason, that series never materialized and I’ve had it on the back burner ever since. I’m going to change that today.
Back when I put the original DIY IDPA Target post together, I was in an interesting transitional period with my shooting. I hadn’t yet decided on a particular sport but wanted to practice with the proper targets. While relatively inexpensive when purchased in bulk , at the rate which I was going to the range, it would have taken me years to use up a bulk order of targets.
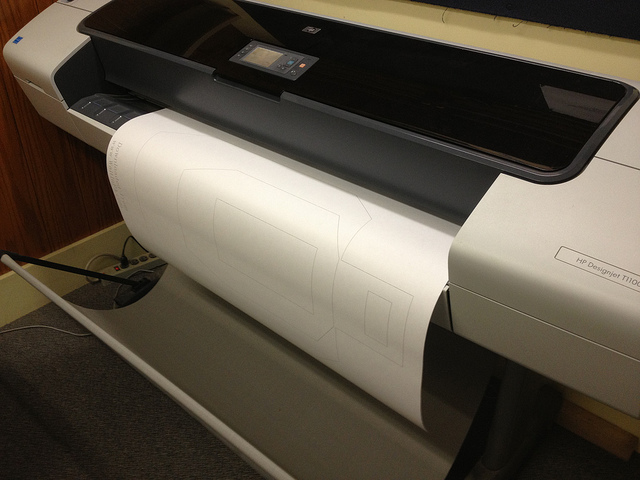
There was a simple solution to this problem, I would simply make my own targets. Early targets were printed on a large format plotter (which I have access to at work). While they looked great and rolled up for easy transport, they were terrible at the range. If I stood too far away I had a hard time seeing the thin black line that made up the target. Worse though was that I didn’t want to accidentally form a bad habit of shooting the white targets (Penalty Targets are White as opposed to the Brown Scoring Targets).
This too was a simple fix. At the time my wife and I were buying all sorts of stuff for our new daughter. Much of that stuff came in boxes that I could easily recycle, which is exactly what I did. I made myself a USPSA Target Template that I could drop onto a large piece of cardboard. This would allow me to easily mark the scoring zones and cut away the excess material. My DIY USPSA Targets weren’t perfect but they were close enough.
Included below are a couple of files which you may find useful. The first is a full scale target on 24×36 paper. You could have that target printed off locally then use it to create your own template. the second file is a dimensioned drawing on letter size paper (The dimensions aren’t perfect. I converted metric dimensions to standard as I drafted the target. I then fudged the numbers to make it easier when using a ruler / tape measure). The third file is a dxf file in the event that anyone has a desire to import the pre-drafted target into a CAD system or CNC Machinery.
If you are planning on making a template, I would suggest doing so out of something thin and rigid. You may be able to pick up a partial sheet of paneling from a home supply store. It should be relatively inexpensive and can be cut with a sharp utility knife. Another option is to use a piece of foam-core / poster-board from a craft store.
Downloads:
- Full Scale USPSA Target (24×36 Sheet Size)
- 1/3 Scale USPSA Target (8.5×11 Sheet Size)
- USPSA Target Template (8.5×11 Sheet Size)
- USPSA Target DXF File (AutoCAD 2013)
Ask The Readers
When it comes time to head to the range,
do you take home made or store bought targets?
2 thoughts on “DIY USPSA Targets”
Comments are closed.
Recent Posts
From Group Ride Roasts to Real Life: My YouTube Channel Update
Well, my lovelies (I realize that sounds weird but at this point I need to lean into it), it's time for some real talk about where I've been and what's been happening behind the scenes at Walt in...
Reconnecting with friends, exploring scenic Pennsylvania back roads, and enjoying the simple pleasure of two wheels Getting the Band Back Together Today was a pretty special day in the...
I realize most USPSA or IDPA targets are around 18″ wide by 30″ tall and the “head area” of the target is 6×6″.
Do you know of any links to pictures where the rest of the target dimensions (like the A zone….seems to be 6X11″…. or how much of the corners are clipped) are posted online?
I’m in the process of buying some 1/2″ thick AR500 plate to make into targets and would like to cut them close to the correct size.
Thanks,
Sean King