
One of the things I genuinely like about this old bike is how it keeps surprising me. The CB750F trunk removal was supposed to be a quick clean-it-and-move-on job. Instead it turned into a time capsule moment that I was not prepared for, complete with mouse droppings, NGK spark plugs that look brand new, an old owner’s manual with some mold on the cover, and what appears to be an inner tube repair kit from the 1970s. But we will get to all of that.
This was a tinkering session more than a wrenching session. It is 96 degrees in the garage right now and Pennsylvania is deep in a heat wave, which has a way of sucking the motivation right out of you. So this was a poke around, knock out some small stuff, and call it a productive afternoon kind of day.
Table of Contents
Finishing Up the Small Parts Hardware
The Dremel was finally charged after dying mid-session during the CB750F rear fork paint session, so I knocked out the rust on the remaining fasteners from the rear fork and rear caliper torque link before moving on to anything else. Small job but it needed to get done and it was satisfying to check it off the list.
I also tried a trick I found online for extending the life of the small wire wheel attachments I keep burning through on the Dremel. The idea is to run a bead of super glue along the backside of the wheel to lock the wires in place before they start throwing. I used Loctite super glue gel on a few different head shapes and set them aside to cure. Whether it actually works is something I will find out over the next few sessions, but at the rate I go through these things it is worth trying.
Getting the Seat Lock Screws Out
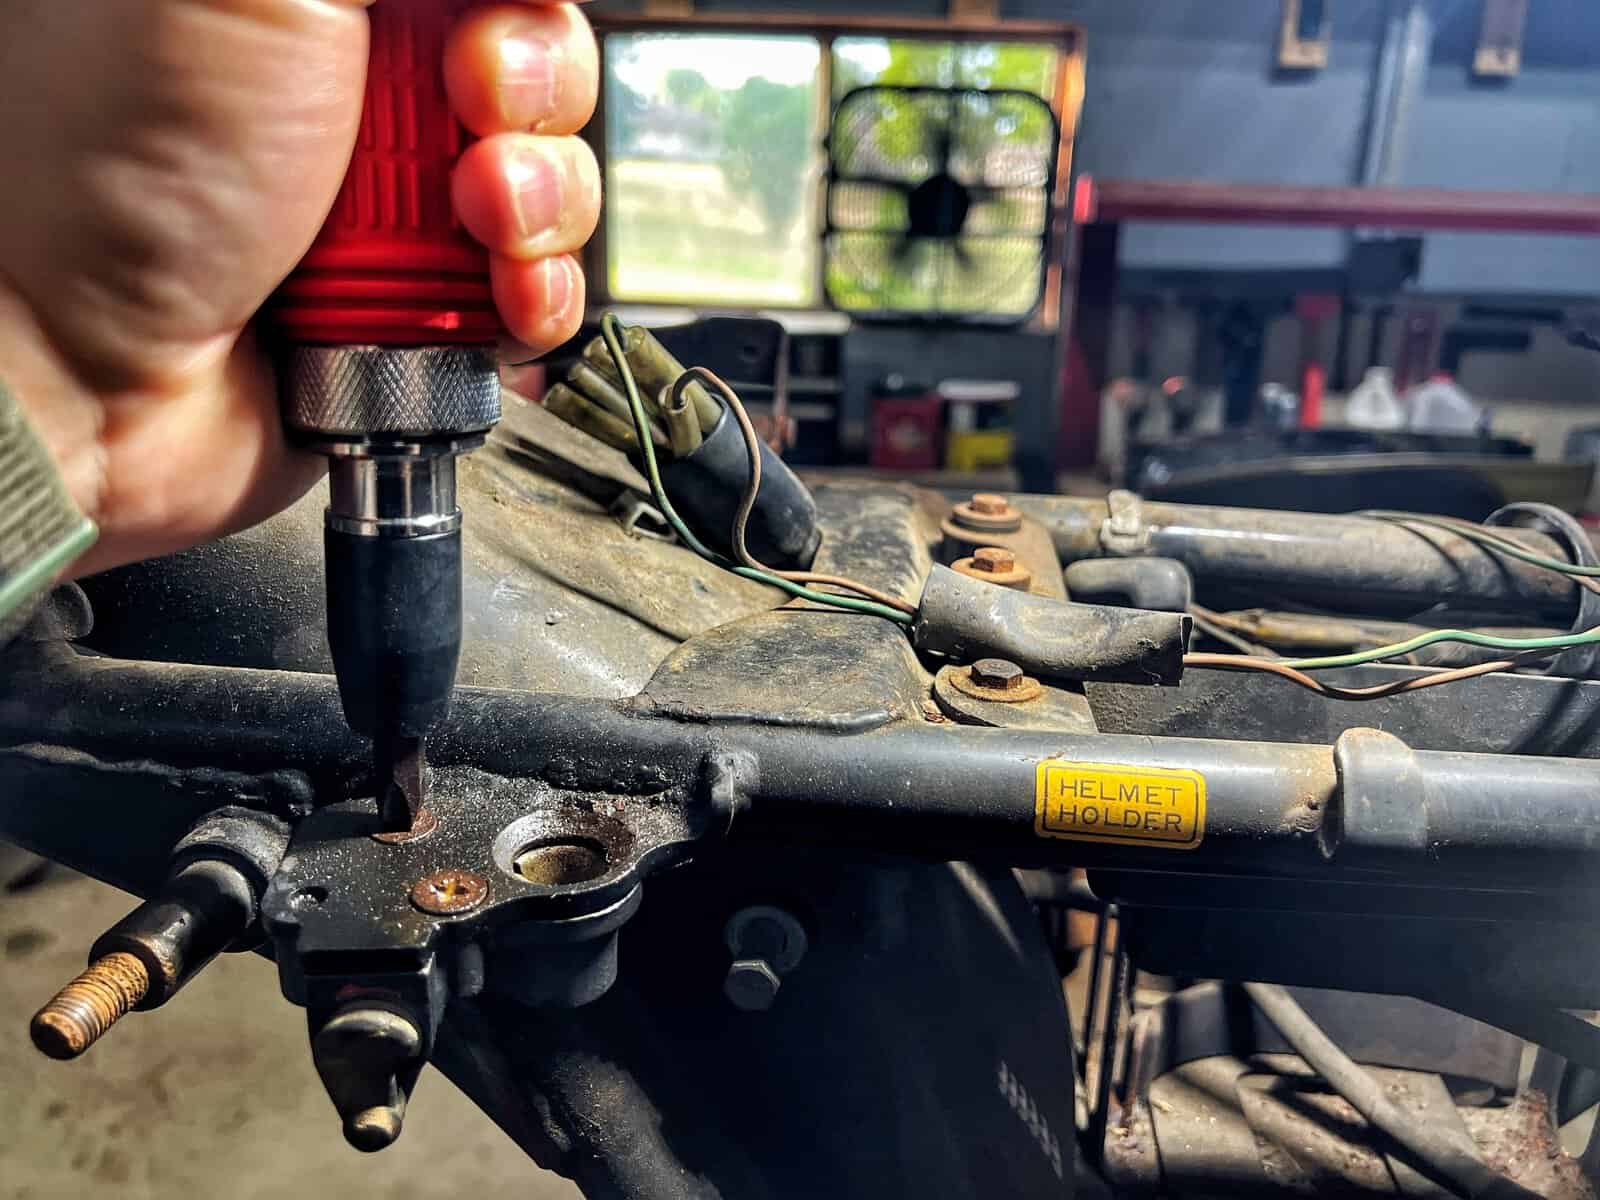
This one felt good. The seat lock has been a problem since early in the build because the key was lost at some point and someone jimmied it open, leaving the cylinder misaligned inside the lock body. The screws holding the lock assembly in place were completely seized, and I had not been able to move them.
The hand impact I picked up from Harbor Freight for seven bucks on sale changed that immediately. You load the bit, apply rotational tension, and give it a sharp whack with a hammer. I tried a dead blow mallet first, which made a satisfying thump but did not deliver enough shock to break the screws free. Switched to a heavier ball peen and both screws came loose in a couple of hits. For seven dollars that tool has already paid for itself twice over.
With the screws out I could actually look at what was going on inside the lock mechanism. The cylinder is definitely misaligned, which is what is preventing the key from going in. There may be a small set screw on the bottom that would allow the cylinder to be pulled out and rotated back into position. I want to get the whole assembly into the ultrasonic cleaner to loosen up whatever gunk has built up inside before I start trying to manipulate anything. That job is getting set aside for another session once I have done a little more research on how these locks come apart.
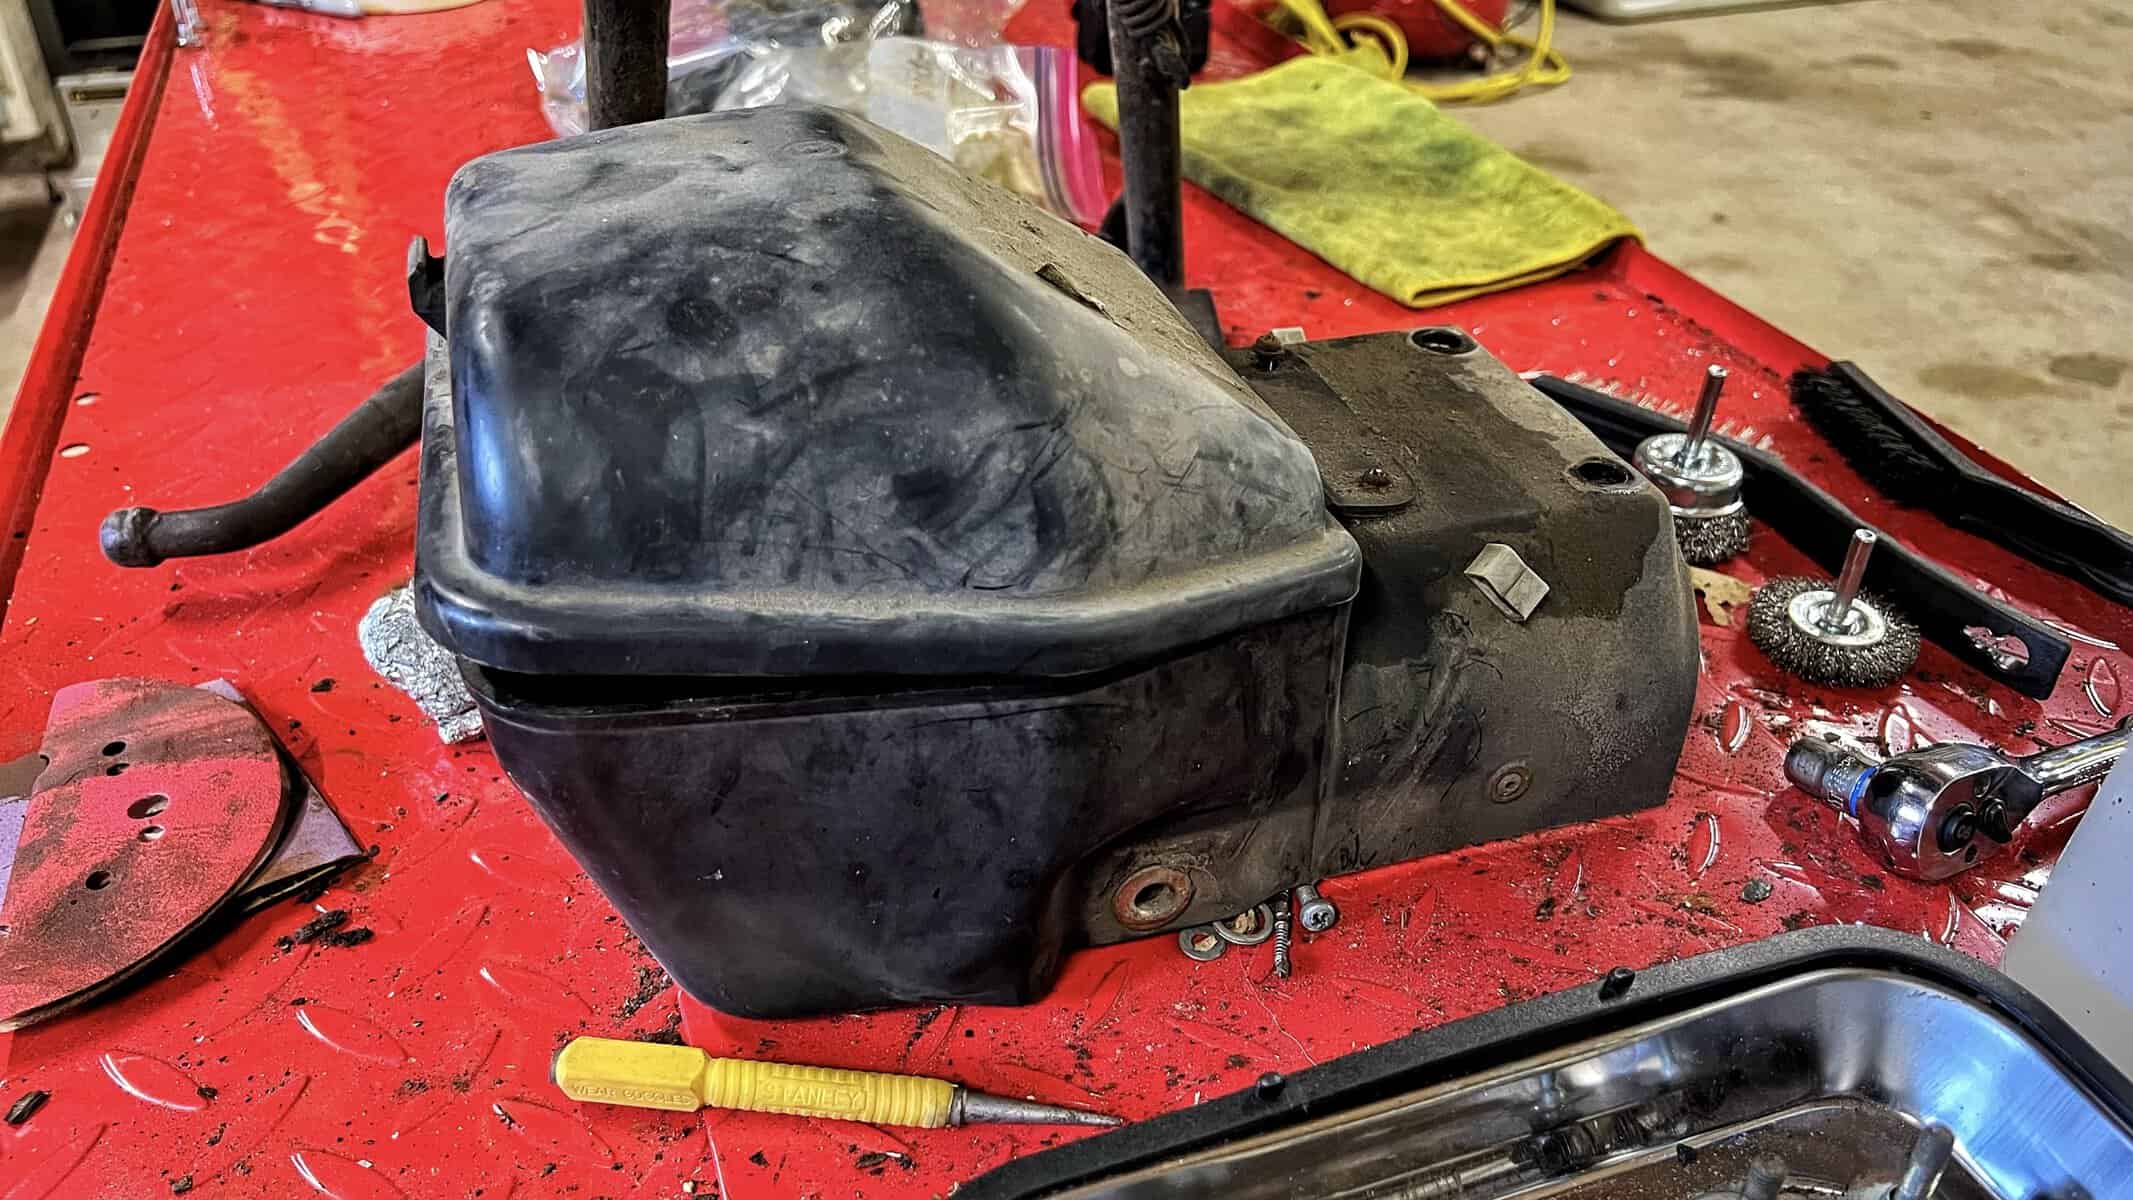
CB750F Trunk Removal
The trunk itself came off with a couple of 10mm bolts once I sorted out which size socket I actually needed, which took a few more trips to the toolbox than I want to admit. One small frustration along the way was stripping a screw on lid. The JIS screwdrivers my dad dropped off early in the build are supposed to handle more torque than a standard Phillips without camming out, but getting the right size matched to the right fastener still takes some trial and error. That stripped screw might just stay where it is.
The trunk lid itself has a plastic hinge that looks genuinely tired after fifty years. It is in one piece now and I want it to stay that way, so I am being careful about how much I flex it during cleaning.
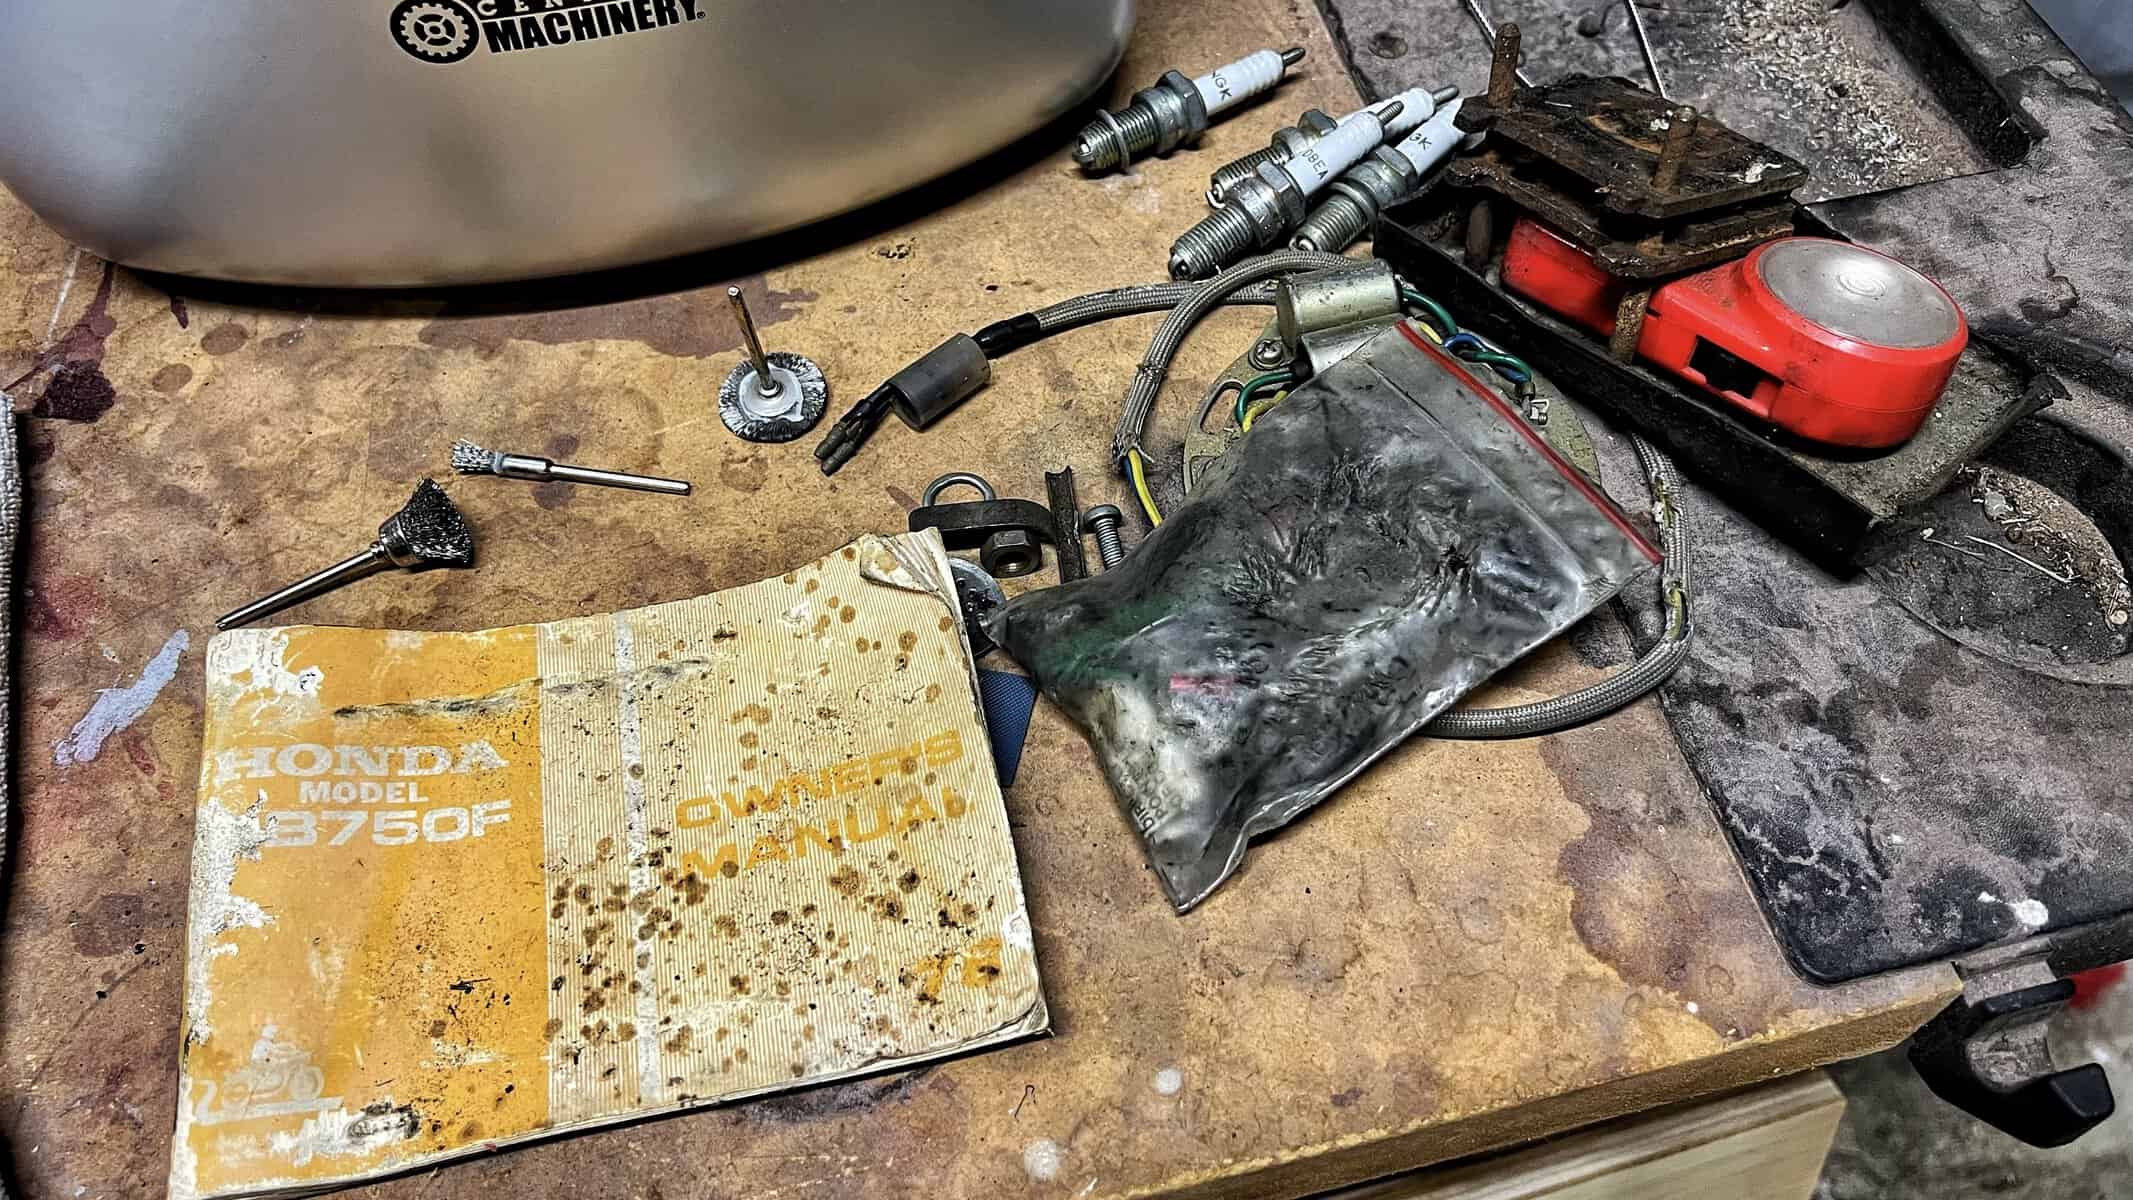
What Was Inside the Trunk
This is the part of the session I did not expect to enjoy as much as I did. Here is what came out of that little under-seat compartment:
Four NGK spark plugs that look like they were never installed. Brand new in the box, or what is left of the boxes anyway. A four cylinder engine takes four plugs, so somebody at some point tucked a full spare set away in there. I am tossing the one corroded plug that clearly came out of the engine and keeping the three clean ones for potential reuse.
A hunk of metal that my dad identified as a spare points assembly. At some point this bike was converted from points ignition to electronic, and the original points assembly was kept as a backup in case the electronic system failed. Makes sense as a precaution even if it never got used.
What looks like the battery pan, a piece of rubberized plastic that is cracked and split and probably not worth saving.
The original owner’s manual, which has some mold on the cover but looks like the pages inside are mostly intact. I want to try to find out whether Honda has this manual available digitally before I consider scanning it myself. If it is not available anywhere, making it accessible seems like it would be genuinely useful to other CB750F owners.
A small inner tube repair kit and a valve stem. An old flashlight from the 1970s. And mouse droppings, which made the cleanup slightly more unpleasant than average. Part of what comes with a bike that spent twenty years in a shed.
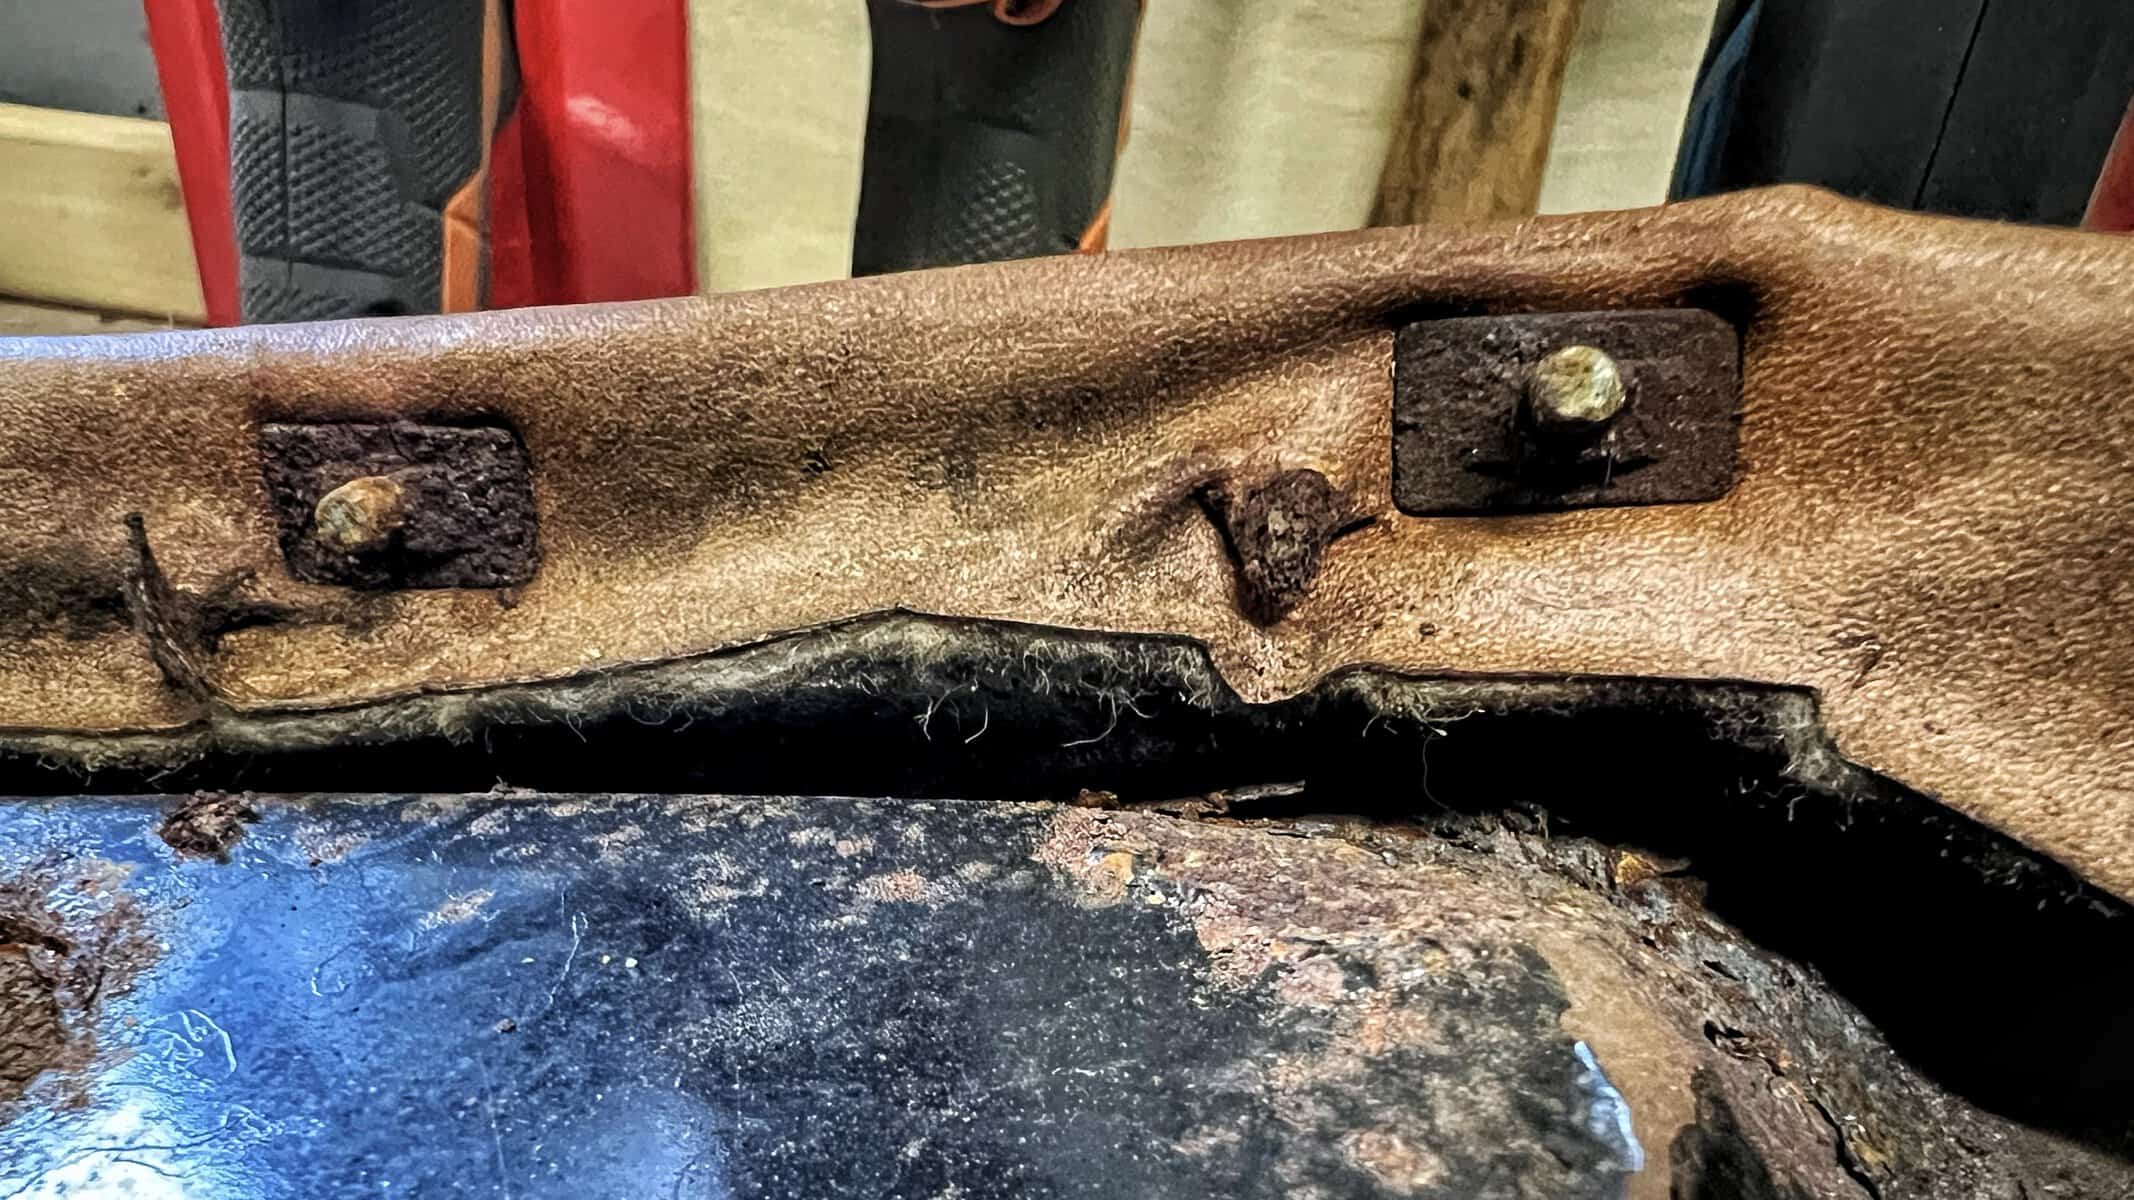
Working on the Seat
While I had the PB Blaster out I hit the spring steel clips that hold the seat cover in place. These clips need to come off before I can remove the seat cover and get into the foam and seat pan underneath. They are corroded and have lost most of their spring, which makes them difficult to work out without snapping them. I broke one and got another out intact using the mini picks from Harbor Freight to get between the vinyl and the clip. The rest are soaking now and I will come back to them after another application or two of PB Blaster over the next few days.
Once the clips come off, the seat cover comes off, and then the real question is whether the foam pad has fused itself to the seat pan after fifty years or whether it comes away cleanly. I am not optimistic but I will not know until I try. The JB Weld steel stick epoxy I picked up at Home Depot is standing by for the rust repair work on the seat pan once I can see what I am actually dealing with underneath.
Ride With Me
If you are following the CB750F Restoration as it keeps moving, subscribe to the WaltInPA YouTube channel so you catch every session as it goes up. If you know someone who would appreciate finding a set of fifty-year-old spark plugs in a motorcycle they just started tearing apart, send this one their way. And if you want to talk through old bike discoveries or share what you have found tucked away in a vintage motorcycle, come hang out in the WaltInPA Discord where the conversation is always good.
Recent Posts
MT-09 Reliability Issues After 12,000 Miles (And Why I'm Finally Getting Inspected)
I've got a confession to make. Right now I'm riding dirty. Both my bikes are overdue for state inspection, and it finally pushed me to sit down and think honestly about Yamaha MT-09 reliability...
The CB750F gas tank repair is finally done. Jeff cut out that big section of rust that had eaten through the bottom of the tank, welded in a new patch, and after way too many weeks of me not being...