
The CB750F gas tank repair is finally done. Jeff cut out that big section of rust that had eaten through the bottom of the tank, welded in a new patch, and after way too many weeks of me not being able to get up there, I finally picked it up. I’m happy with how it came out. I’m also dealing with a side effect of the repair that I didn’t see coming, and it’s going to change my plan for this tank.
This episode is more of a progress update than a hands-on job. Between the tank, the frame, and a batch of new tools I picked up for the garage, there’s a lot of ground to cover even though none of it is dramatic on its own.
If you want the full rundown with visuals, the video’s embedded below. I’ll walk through everything below so this post stands on its own either way.
Table of Contents
The Gas Tank Hole Is Finally Fixed
If you’ve been following along, you know there was a hole of rust here in the tank that I’d been sitting on for a while, documented back when I first found it. Jeff had it done weeks before I actually got up to pick it up. I felt like a bad friend about it honestly. Between his car show schedule and my weekends getting eaten up by my wife’s work and me trying to squeeze in rides, it took forever to line up. He never seemed to mind, or at least he says he didn’t.
But the tank is home now, and the repair itself looks good. He cut out the bad section and patched in new metal, clean weld, no more hole. That part of the job is done.

Burnt Paint I Didn’t Plan For
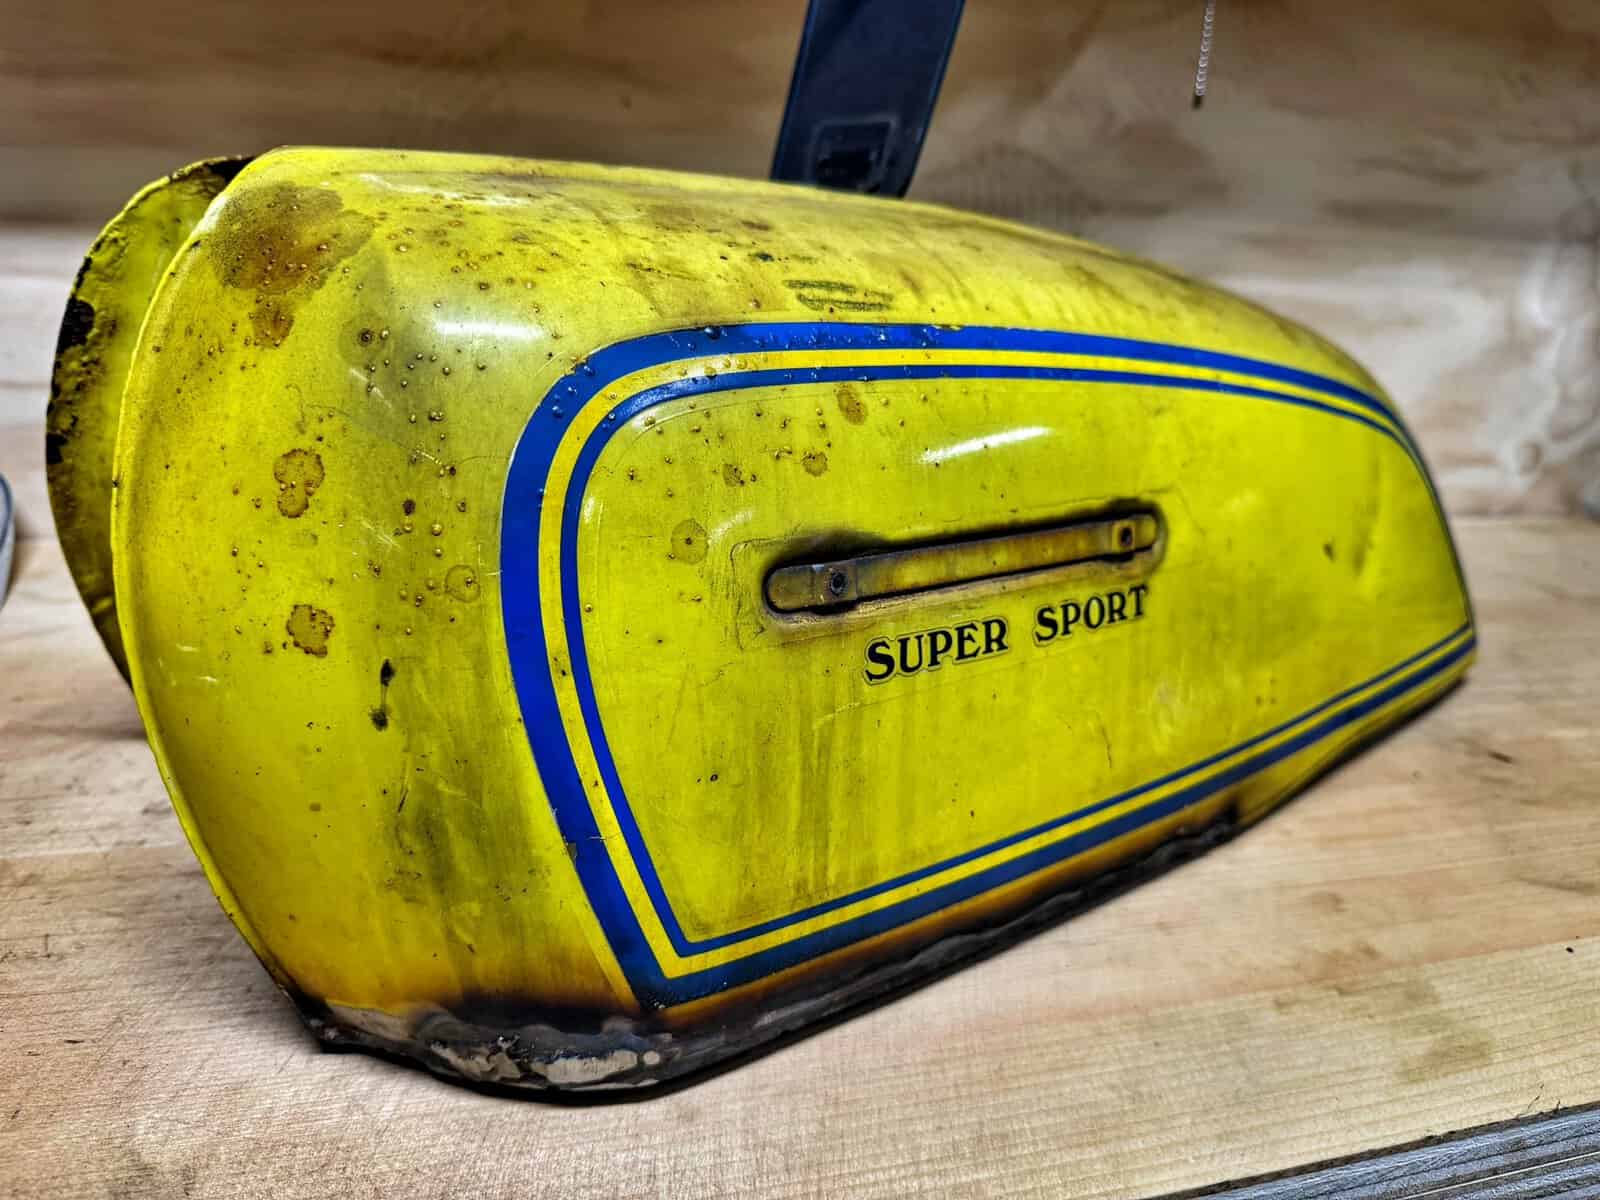
Here’s the thing I didn’t think through ahead of time. My original plan was to leave the outside of the tank alone. I knew it had faded paint and some patina, and I was fine with that. I actually liked the idea of a tank that looked its age instead of coming out shiny and new.
The problem is the welding burned some paint on the outside of the tank, not just underneath where I figured it would stay contained. If it had stayed under the tank, I wouldn’t have cared. Nobody’s looking under there. But now I’ve got a patch of burnt paint on the side, and that breaks the whole plan of leaving it alone.
I don’t love the idea of painting a stripe across just the bottom to hide it. I think it would look worse than the burn mark does. So I’m probably repainting the tank now, which I wasn’t planning on doing. And honestly, between the burnt spot and some little pock marks under the paint that are going to rupture into bare metal once I start cleaning things up anyway, trying to save the original paint might have been wishful thinking from the start.
What I’m not looking forward to is the pinstripes and the Super Sport decals. Those run over a hundred bucks a side if I go the official route, and that’s two sides. I’ve got a friend with a vinyl machine who might be able to whip something up instead, so we’ll see how that goes before I commit to anything.
Vinegar and Salt, Round Two
There’s a little surface rust inside the tank too, nothing like the hole was, just some light rust from where a bit of old gas sat against the metal on the kickstand side for who knows how long. The fix for that is the same one I’ve been planning for the wiring loom, which is vinegar and salt.
The idea is to fill the tank, let it sit for about a week so the vinegar eats the rust, then empty it out, rinse it, neutralize whatever acid is left with baking soda and water, and finish with an alcohol rinse to make sure it’s completely dry before I coat the inside. Since I’m already making a vinegar run for the tank, I figure I’ll grab extra along with some mason jars and finally get moving on cleaning the wiring loom the same way. That one’s been on the list for weeks now and it keeps getting pushed back.
The Frame Paint Situation Got Away From Me
The big piece of news is that the frame is painted. That wasn’t supposed to be the plan either. I didn’t want to blast it, didn’t want to pay to have it powder coated or professionally painted. This bike isn’t going to be a show piece, it’s going to be a rider, and I was fully expecting some patina on it anyway.
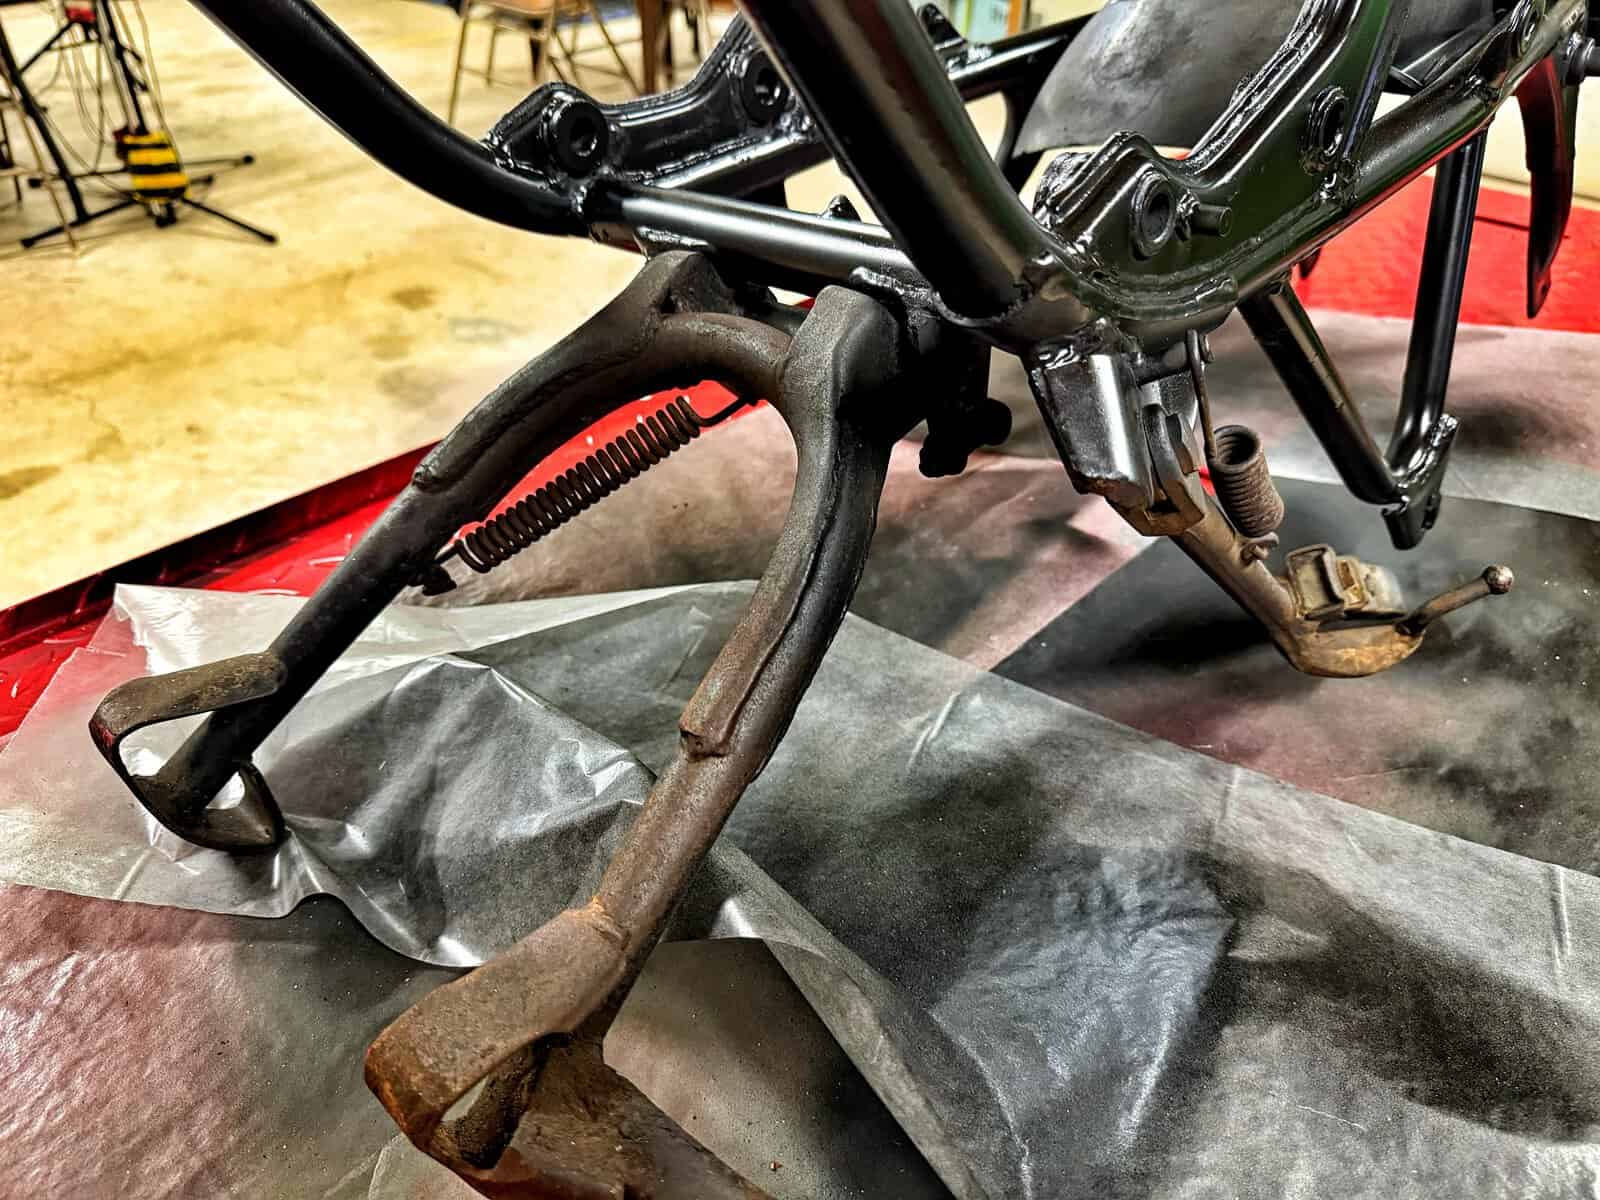
So the plan was just spot repairs, wire wheel the rust clusters around the welds, hit them with self-etching primer, touch up with satin black enamel, done. In theory that works great. In practice, I was spraying an aerosol can and the pattern coming out was maybe three or four inches across. So touching up a little chip with a little rust in it turned into a big blob of primer and pock marks everywhere. By the time I’d primed everything that needed it, basically the whole frame was primed anyway, so I just painted the rest of it to match.
It’s been about three days and I can still smell paint when I walk into the garage, so I’m giving it a few more days before I handle it. I don’t want to get fingerprints and marks in it while it’s still soft.
Two pieces didn’t make it into this round, the center stand and the kickstand. I couldn’t get the springs off while the frame was still too wet to grab onto, so those are getting painted separately once I can wrestle the springs loose.
A Few New Tools Worth Mentioning
My dad sent me a video of garage tool recommendations for guys getting into working on vintage Japanese bikes. Normally I skip those, they tend to be the same list of “buy a welder and a sandblasting cabinet” that isn’t realistic for most people. This one was actually useful, broken into real motorcycle-specific tools, general shop tools, and household items that are handy to have around.
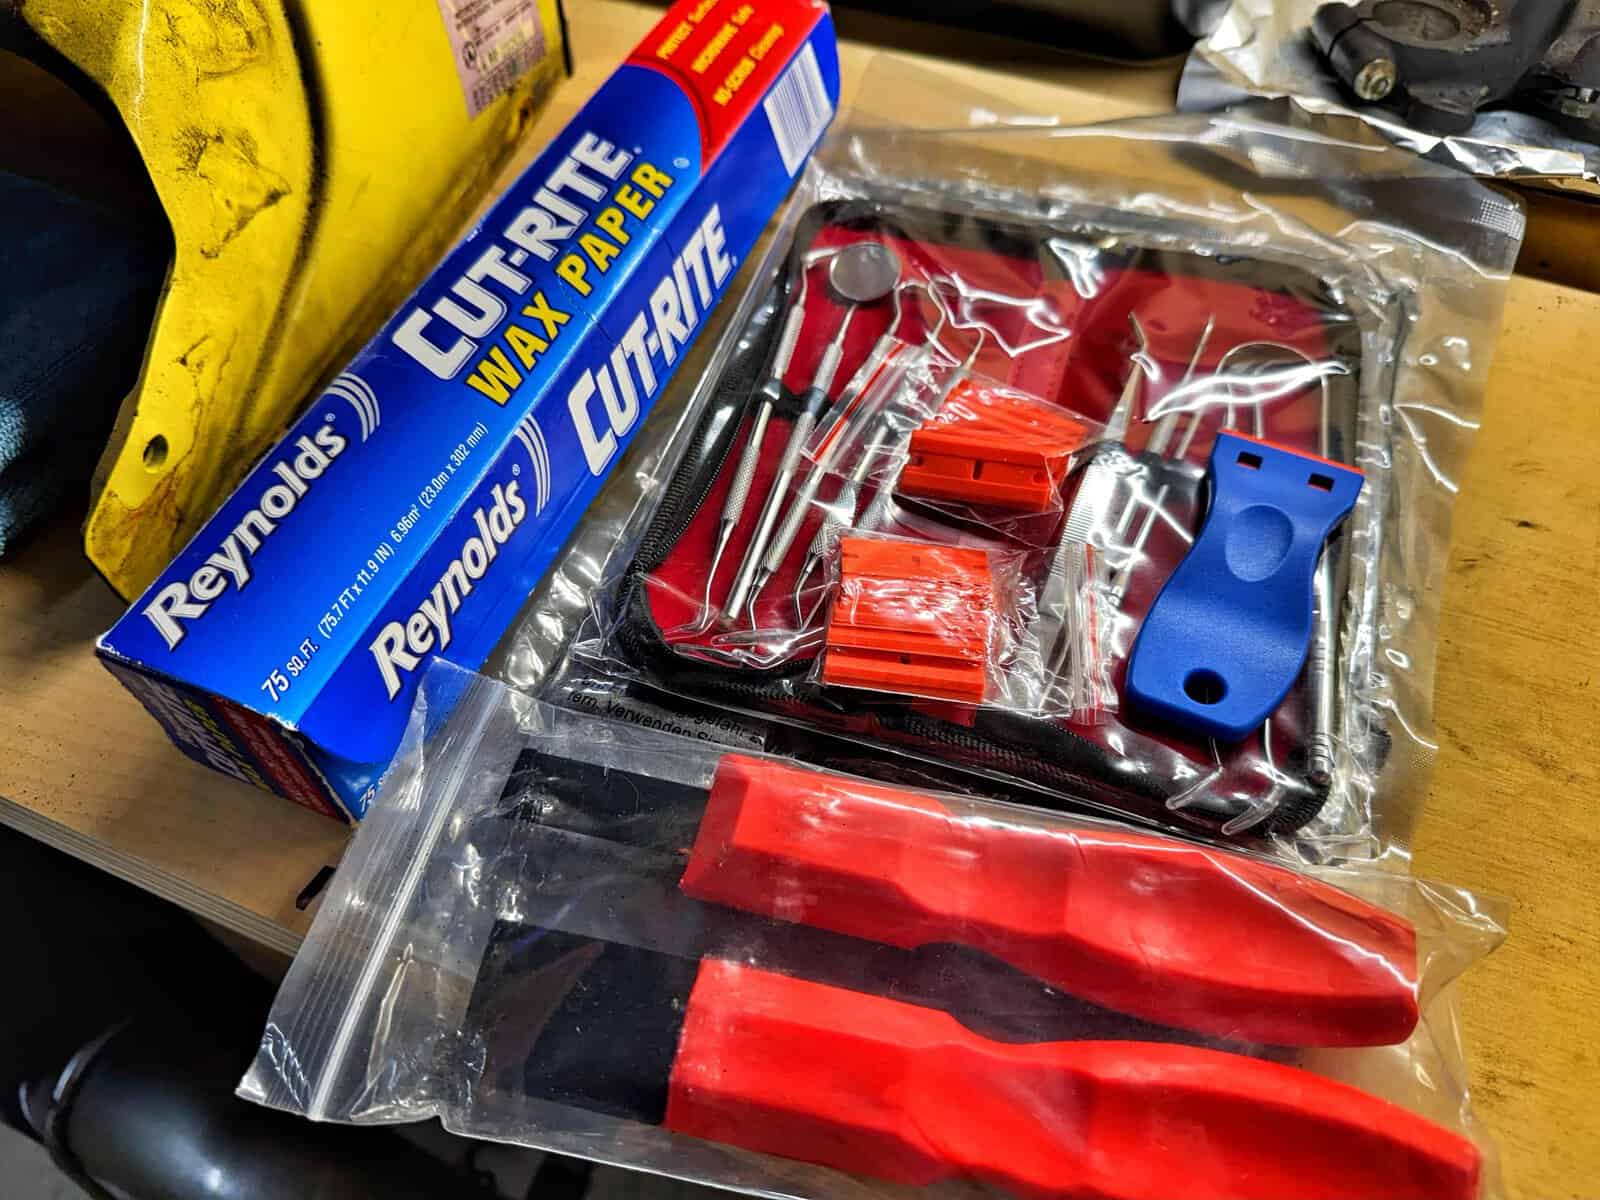
I bought carbide scrapers for cleaning gaskets off cases without gouging the metal underneath, those were about twenty bucks. A set of dental picks for about ten dollars turned out to be more useful than I expected, same with a cheap set of plastic razor blades with a scraper that I’d been putting off buying because I figured my regular razor blades were good enough.
The other recommendation that stuck with me was using 0000 steel wool paired with cheap oven cleaner on chrome. Supposedly it takes the pitting out without a lot of effort. I’ve got some pieces, the front fender especially, that could use that treatment, though I think I’ll try aluminum foil and WD-40 first to knock off the worst of it before going in with steel wool.
All told I spent about fifty bucks on stuff that isn’t technically restoration work, but I think it’s going to pay off the next time I’m elbow deep in gaskets or cleaning up chrome.
What’s Next
Once the frame’s fully cured I’ll get it off the lift and onto a blanket, then deal with the overspray halo I managed to leave on my brand new lift despite using parchment paper underneath the frame. After that, the wiring loom finally gets its vinegar and salt treatment since I’ll already have the supplies on hand from the tank.
Ride With Me
If you want to keep up with the CB750F Restoration series as it happens, subscribing to the WaltInPA YouTube channel is the best way to catch each update as it goes up. If you know someone else working through an old bike in their garage, send this one their way, it might save them from making the same primer can mistake I did. And if you want to talk through this stuff in real time, swap tips, or just hang out with people who get why you’d spend a week soaking a gas tank in vinegar, come join us in the WaltInPA Discord. Good people, good conversation.
Recent Posts
The Martin Moto Modern Classic Ride-In is my favorite event of the year. (I don't go to a lot of them, but this one is always circled on the calendar.) The day after the show, Goofy, Trekkie, and I...
I've been doing a ton of maintenance on waltinpa.com lately and honestly it's been a long time coming. The short version is that I spent a couple of weeks noindexing old blog posts that had nothing...