
The CB750F restoration is underway and day one of actual work taught me something pretty quickly: working harder is not always the answer. I pulled the rear axle hardware off the bike and started scrubbing with a nylon brush, then a brass brush, then a steel brush. Nothing was really cutting through the grime. This bike has a non-O-ring chain drive with an oiling system that requires the chain to be lubed roughly every 300 miles. The result of that over decades is that the entire back end of the bike is caked in flung oil and baked-on grime that a hand brush alone is not going to touch.
That’s when I stopped and thought about it. I already had the ultrasonic cleaner sitting there. I picked it up a while back thinking it would come in handy for carb cleaning. Turns out it was going to earn its keep a lot sooner than I expected.
Table of Contents
Setting Up the Ultrasonic Cleaner
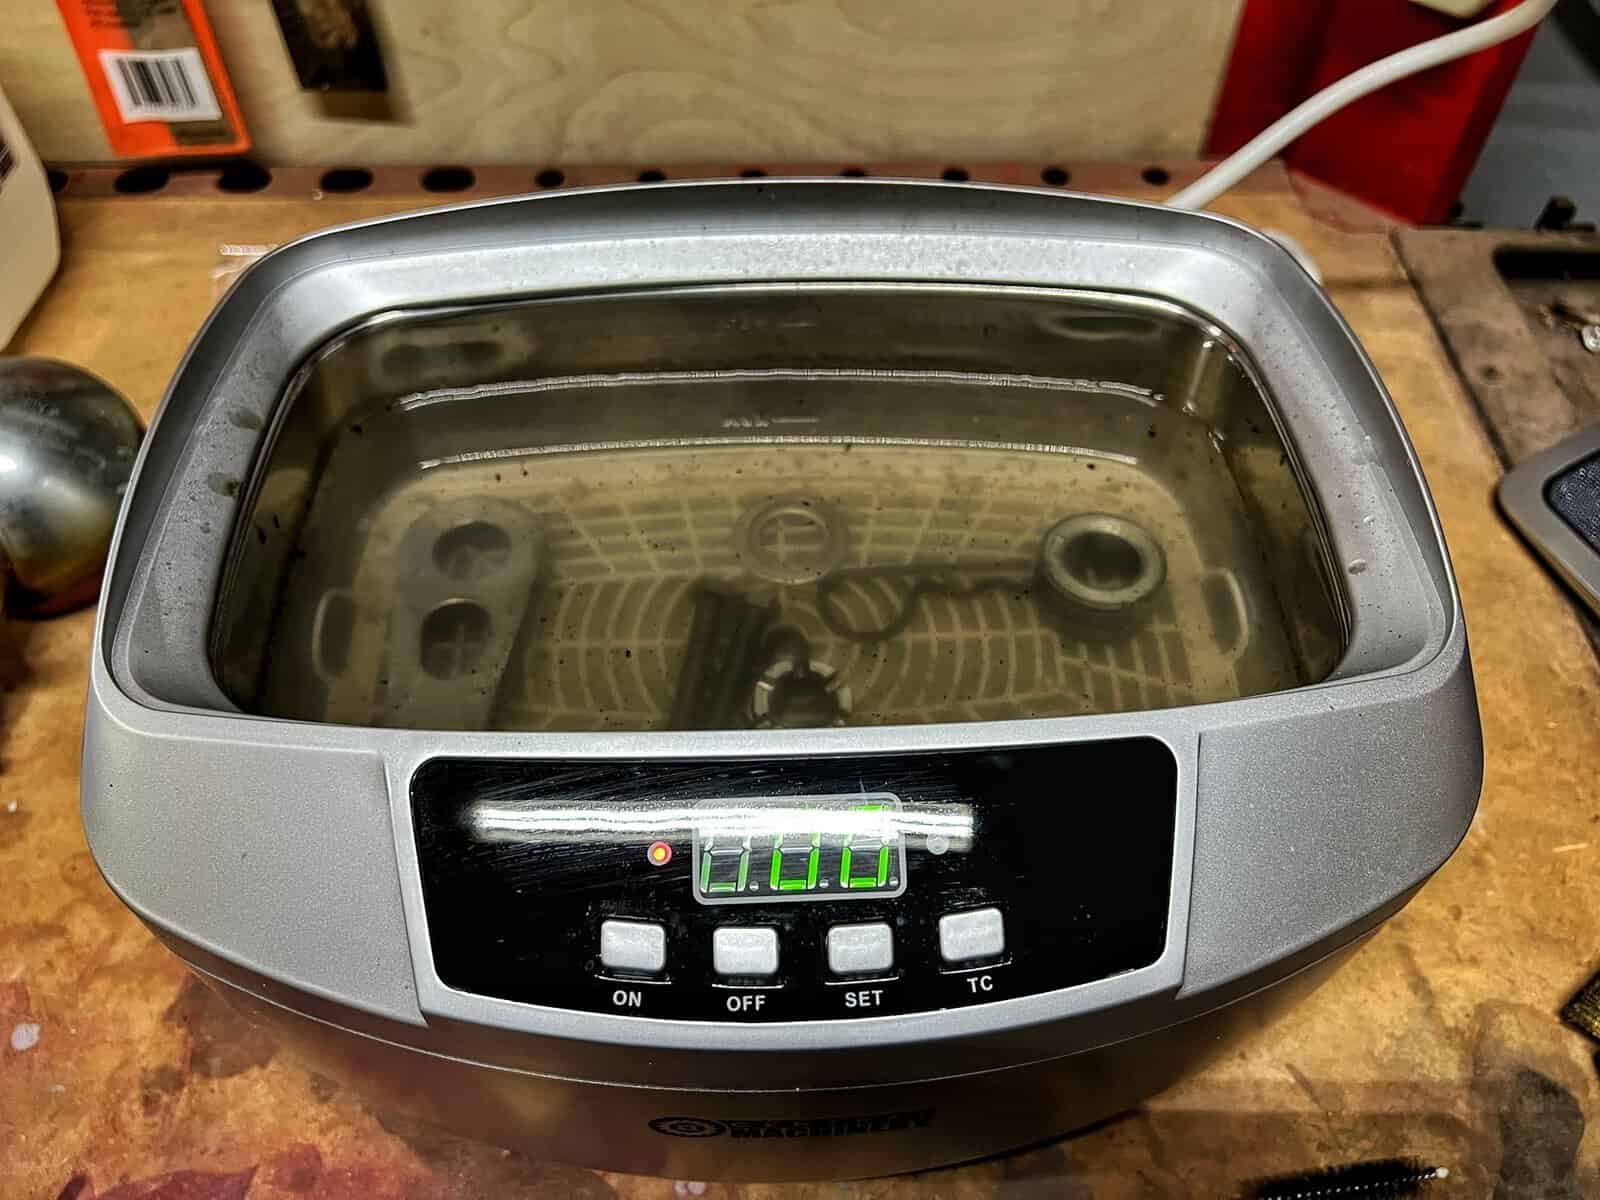
My wife picked up some Awesome Orange degreaser from the dollar store, which is exactly the kind of win that makes a project like this go smoother. I mixed roughly half a cup to a cup into a gallon of water, dropped it into the ultrasonic cleaner, and ran it on a heat cycle. A lot of the water-soluble cleaners work well for this: Awesome Orange, Simple Green, that purple one whose name I can never remember. The ratio does not have to be precise. You just want enough degreaser in there to do the work without turning the bath into a soupy mess.
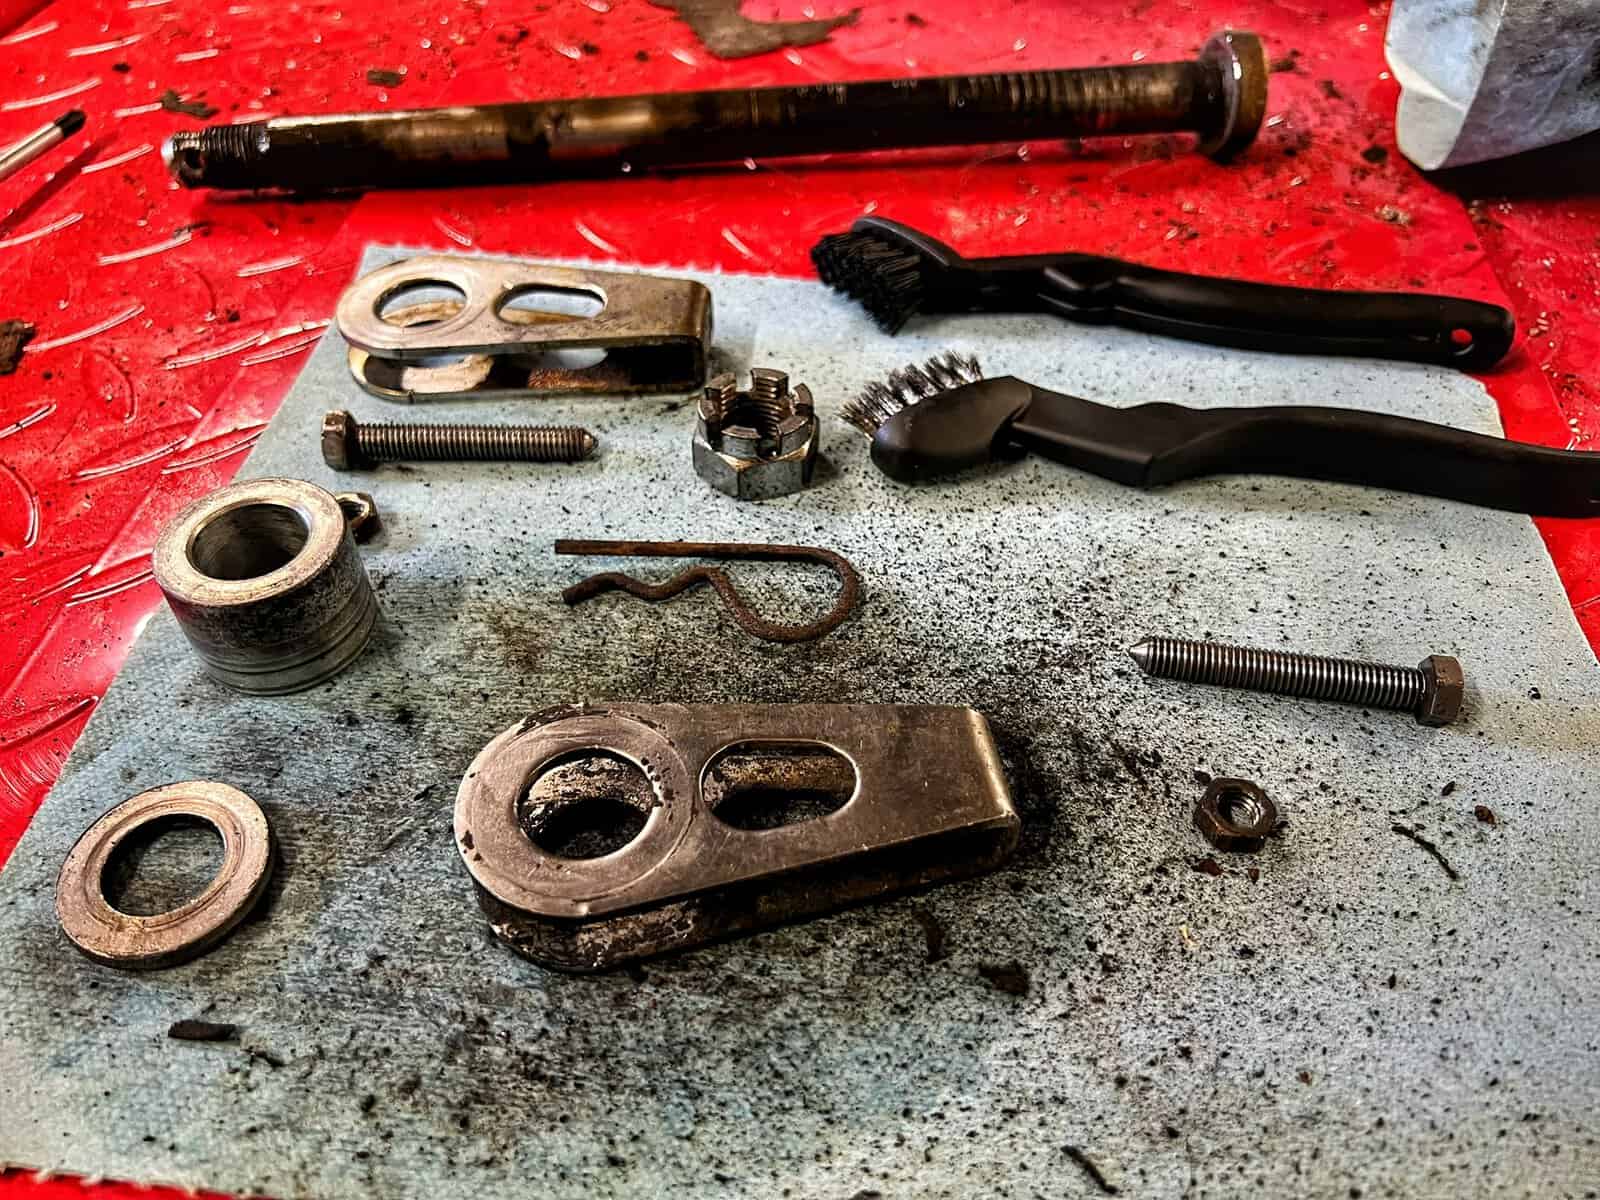
The parts I started with were the rear axle adjusters, the adjuster bolts, a large spacer from the clutch side of the axle, the retainer pin, what I believe is the castle nut from the end of the axle, and a washer. Small stuff. Perfect for a first run.
I set it for about three minutes to start. When I pulled the parts out I was not blown away, so I ran it again. And then again after that. On older parts with decades of baked-in grime, one cycle is probably not going to get you there. Give it time.
CB750F Rear Axle Hardware Cleaning Results
Here is where I’ll be honest about expectations. The ultrasonic cleaner softened everything up nicely, but you still have to do some work after. The dollar store toothbrush I had was too soft to do much on its own. Once I switched to the brass brush, though, it was a different story. The degreaser had loosened everything up enough that the brush was just knocking grime off without any real effort. That combination of ultrasonic soak plus brush work is the move.
The tail light mounting brackets were a different situation. One cleaned up reasonably well. The other has heavy corrosion that the degreaser was not going to touch. My plan there is to hit it with some CLR and see if I can eat some of that rust down before wire brushing it again. They do not have to look perfect. They just cannot be actively corroding.
One thing I had not thought through: after the ultrasonic bath, the parts are wet. I used the air compressor to blow them dry and have been debating whether a light coat of WD-40 would help keep surface rust from forming in the meantime. I do not know that it is the right call, but it is what I have been doing while I figure out a better answer.
Pulling the Rear Turn Signals
With the parts soaking I shifted and pulled the rear turn signals off. This was straightforward once I traced the wiring. These old Honda harnesses use color-coded bands on the wire ends that correspond to matching colors on the harness side. Green to green, orange to orange. Simple system and it works, but you have to clean the wire ends before the colors are actually readable. When they are practically black with grime the color coding is useless.
One thing worth knowing if you are working on a CB750F: the fasteners on these lights are JIS, not Phillips. My dad dropped off a set of JIS screwdrivers along with the bike. Japanese Industrial Standard screws look similar to Phillips but are shaped slightly differently and are designed to handle more torque without camming out. If you try to drive them with a standard Phillips you are going to chew them up. Do not ask me how I know that people figure this out the hard way.
Checking the Wiring
While I was pulling the turn signals I ran my fingers along the wires and felt some snags in the insulation. A few spots that felt like cracks or nicks. After cleaning them up and getting a better look, most of them appear to be surface damage rather than anything going through to the bare wire. My plan is to hit the questionable spots with heat shrink tubing as a precaution. Nothing that looked like an immediate electrical problem, but I want to know for sure before this thing gets put back together.
The wiring on these old bikes is simple compared to anything modern. One wire runs into the light housing, and the other connects directly to the back of the mounting plate.

Chrome Cleanup and What Actually Works
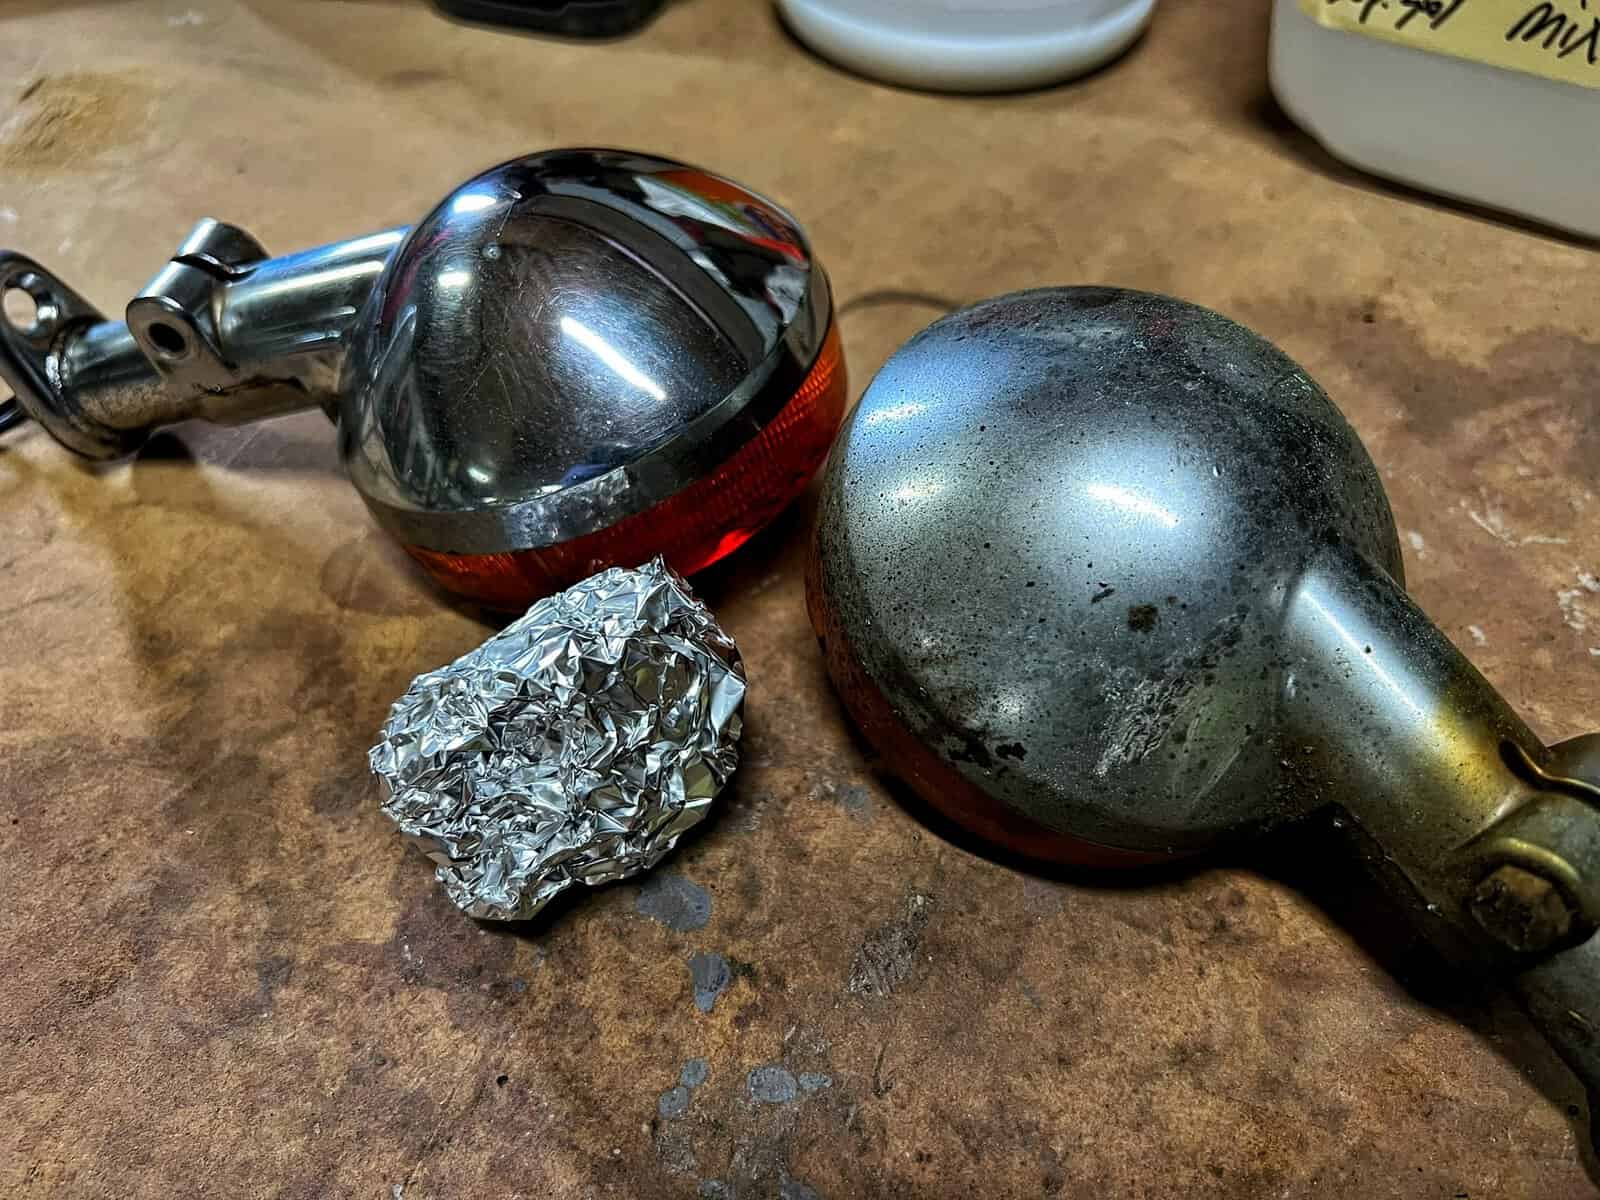
While the parts were cycling through the ultrasonic cleaner I started working on the turn signal housings. The chrome has surface rust and oxidation but the underlying material looks salvageable. I tried aluminum foil as a chrome cleaning method and it works, but it is annoying to use in practice. The foil keeps shifting and changing shape, which is fine for large flat areas and frustrating for anything with curves or tight edges.
If anyone has a better method for cleaning up pitted chrome without scratching it, I am genuinely asking. I have got a fair amount of chrome to go through on this bike and I do not want to be wrestling with aluminum foil the whole way.
What I can tell you is that the before and after on these turn signals is pretty striking. They looked rough when they came off. After cleaning they look like they belong on a bike someone actually cared about. That is motivating when you are early in a project and it still looks like a parts pile more than a motorcycle.
Where the CB750F Restoration Goes Next
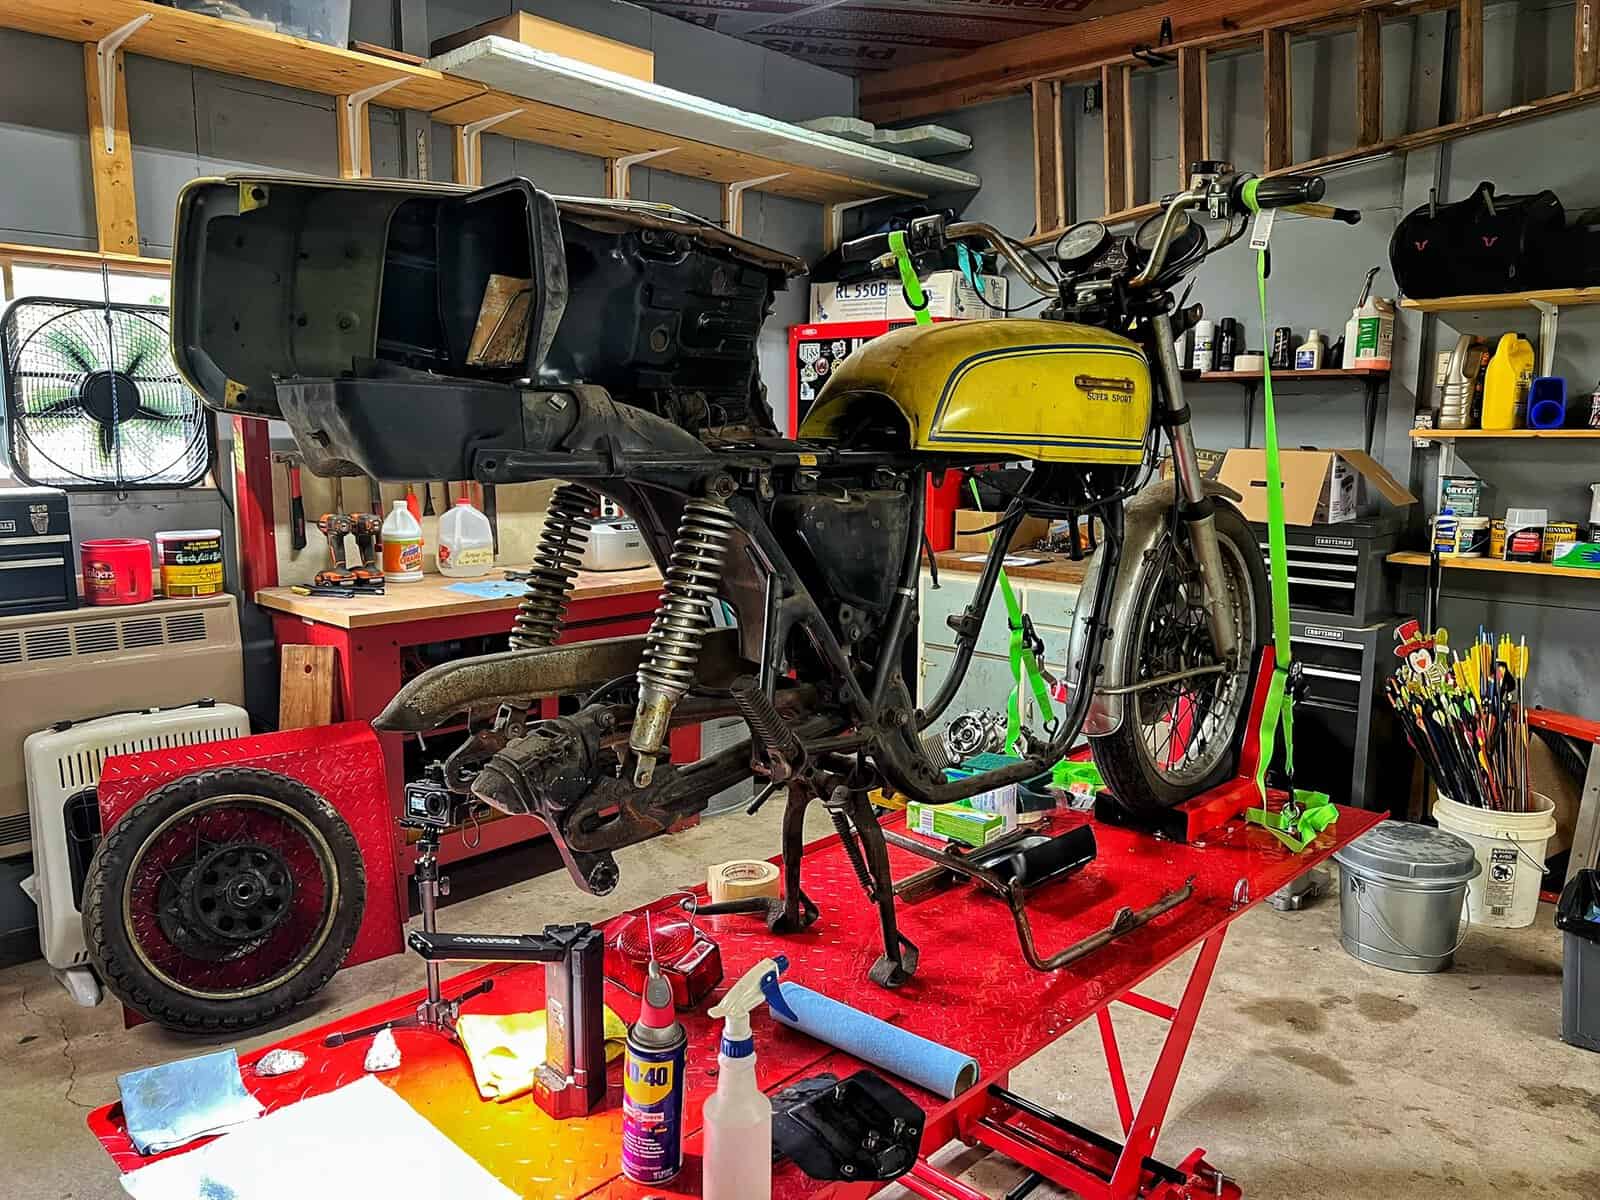
The turn signals are off and cleaned. The rear axle hardware is cleaned and drying. Next session I want to pull the tail light, clean up the license plate holder, work on the rear rail, and then get into the shocks. After that, the rear brake caliper stay and the chain guard.
The rear wheel is sitting on the floor and it is heavier than it looks. The sprocket needs to come off, the rotor needs to come off, and then there is serious cleaning work to do on the wheel itself. The spokes are corroded and I have not figured out the best approach there yet. If you have cleaned up corroded spokes without pulling them and re-lacing the wheel, I would genuinely love to hear how you did it. Drop something in the comments or come find me in the Discord.
New tires are a given. The tubes will be replaced too even though the front is somehow still holding air after 40-plus years. I am not trusting that.
Ride With Me
If you are following along on the CB750F build, the best place to keep up is the WaltInPA YouTube channel where the video version of each session goes up alongside these posts. If you know someone who has wrestled with an old bike project or is thinking about starting one, share this with them. And if you want to talk through restoration questions with people who have actually done this kind of thing, come hang out in the WaltInPA Discord. Good people in there with real answers.
Recent Posts
If you have been around the channel for a few years, you might remember the Road Apple Ride. If you are newer here, you have probably never heard of it, and honestly, that is exactly why I wanted to...
From Pep Boys Helmets to Real Gear: Our Budget Motorcycle Gear Stories
Nobody on Kickstand Conversations started out with good gear. Trekkie rode for years in a knockoff waxed jacket. Goofy's first helmet was a $29.99 Pep Boys special from 1989. I started out in a...